
Your Email Into Evernote
NOTE: This was originally posted on biggreenapp.com and has been migrated here.
How to capture your email, no matter where you find it, into Evernote to make it actionable.
We all get enough email. Too much email. WAY too much email. It’s hard to keep up. Keep checking for blog posts to help you to deal with your inbox in effective ways, but today, here’s a helpful way to get the emails you want out of your way and into Evernote where you can manage and even schedule them for when you have time to do the things you want to do. Assuming important emails are included in the list of things you want to do, let’s get started!
WAIT A MINUTE
Before we talk about how it’s done, this is a powerful feature. This feature is a valuable tool that has the potential to save you A LOT of time. For this reason, the Forward Emails to Evernote feature is only available on Plus and higher accounts. The PLUS plan is $34.99 per year. If you see value in sorting quickly through your email so you can dedicate time and attention ONLY to what you need to reply to… on your terms, this feature alone makes it worthwhile. This was the primary reason I stepped up to a paid plan.
Click here to read Evernote plan details.
LET’S GET TO IT
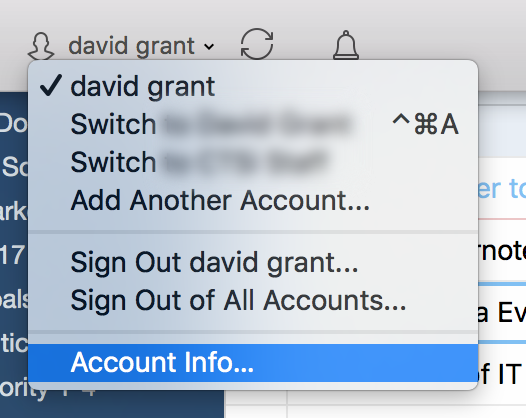
- Start with whatever app you feel comfortable with. These steps will be different for each environment, but you’ll get the idea. In the Mac app, I’ll choose “Account Info…” from the account switcher drop-down.
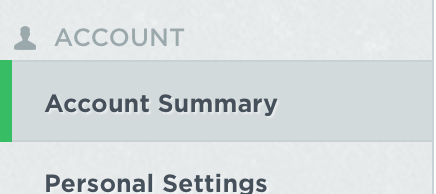
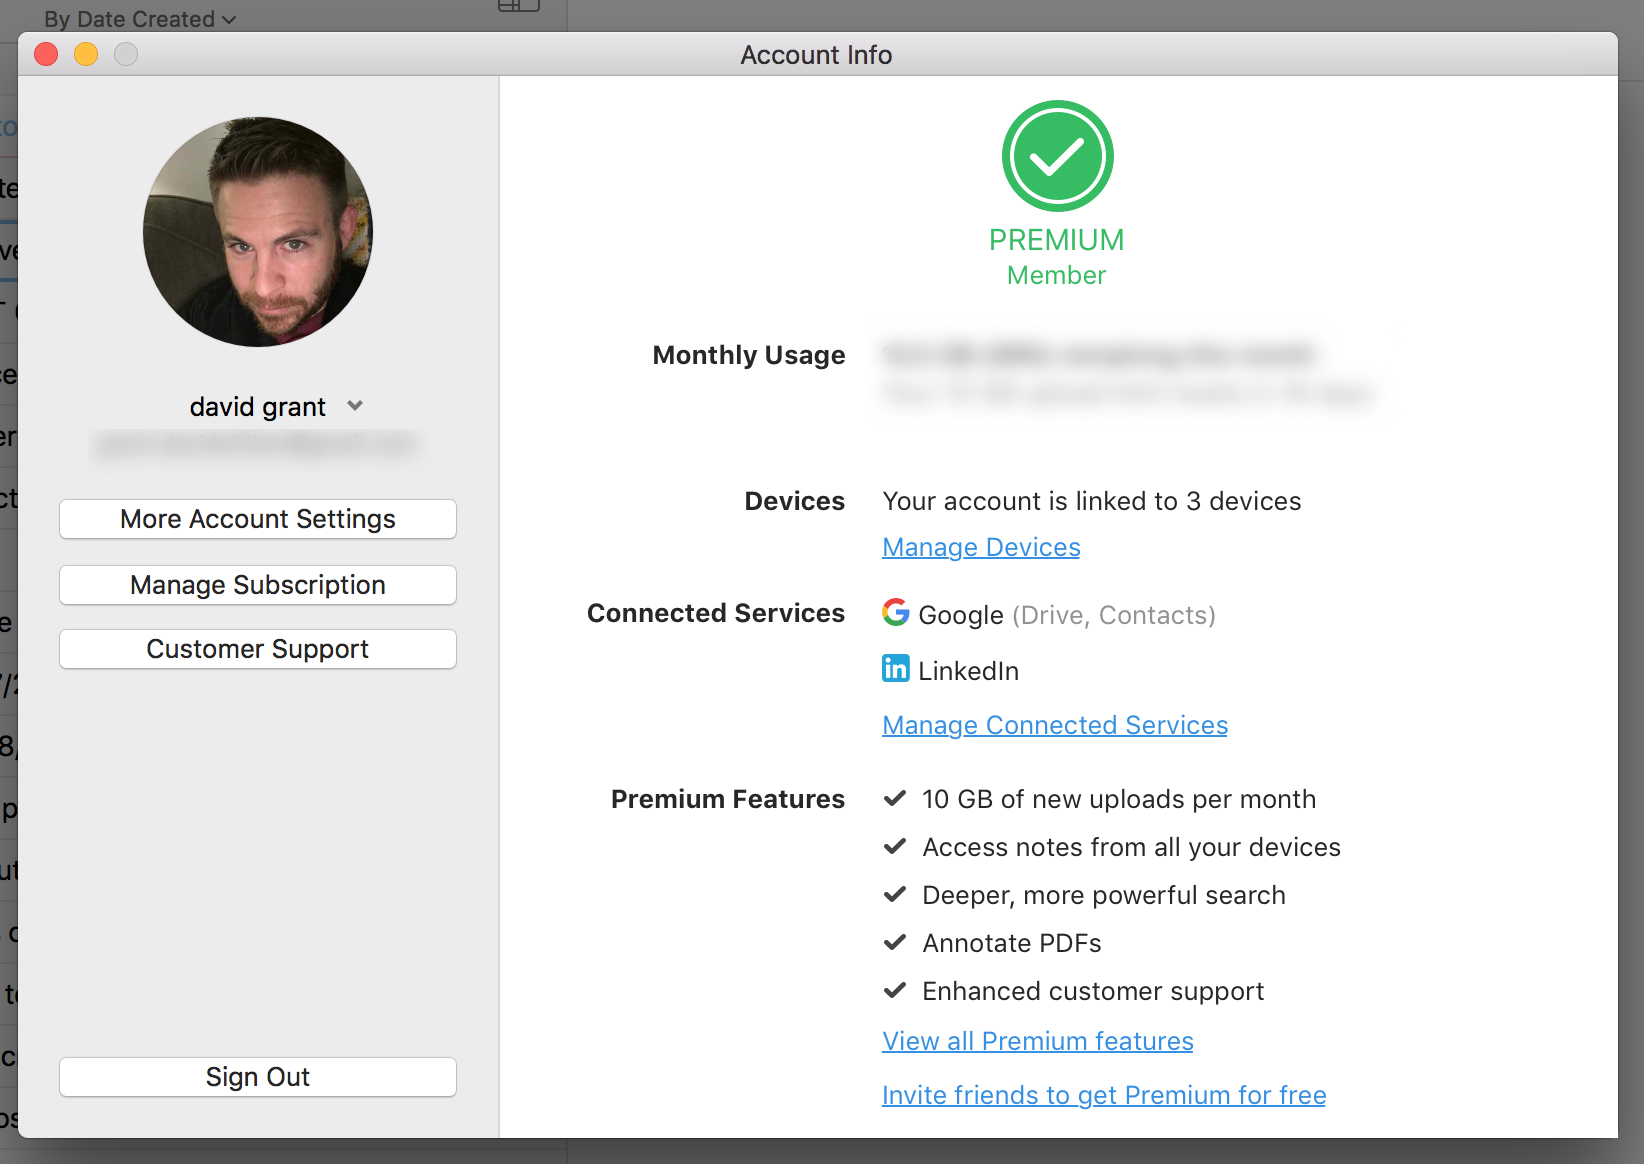
- This will open up the Account Info window. Click on “More Account Settings.”

- You’ll be taken to a link in your web browser. If you are logged in, you’ll head to the settings page with your “Account Summary” tab selected.
- Find the “Email Notes to” area. That’s the email address you need to use to send an email to your Evernote account.
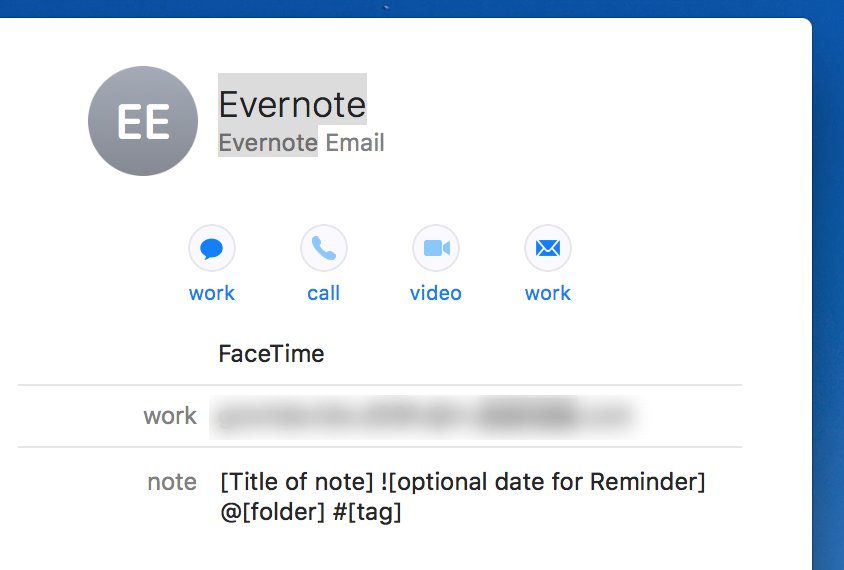
- The best way for you to send email is to have this email address as available as possible. To do this, I recommend you create a contact in whatever email environment(s) you use so you can quickly type the name of your Evernote contact in the To, CC, or BCC fields and have the email sent on its way. This is what mine looks like.
When I address my email, I just start to type “Evernote” and the Mail app will recognize the contact and fill in the email address.I also have a note with short cuts in case I want to do anything special with the email I’m sending to Evernote. [Title of note] ![optional date for Reminder] @[folder] #[tag] I can specify the Title of the note, and choose to set the date of a reminder, the folder, and even tags. For example, an email with the subject reading, “Email John !08082017 @Inbox #Important” would go into my folder titled “Inbox” with a reminder set for August 8th with the “Important” tag applied.
There you have it. Email into Evernote. Again, it’s different depending on your platform. For example, on IOS, the email address is found by clicking the “Accounts” button in the bottom left then choosing “Settings” and “Evernote Email Address.” You might need to do a bit of searching, but you’ll find it.
Where do your emails go?
I don’t use the custom options for the most part, but as I mentioned, you can tell Evernote which folder the email should be stored in with the “@” before the name of your inbox. The reason I don’t use that feature much is that my #1 goal is to get through my inbox quickly so I can organize my tasks and my day and not play around with email. If that is your goal, I highly recommend you create a folder that you reserve in your mind as your digital inbox. Stuff lands there, but you regularly clean it out and move it to a more permanent place. I have cleverly named my inbox folder, “Inbox.”
To do this, you’ll need to set your default notebook.
Here are instructions from Evernote taken from their Help & Learning articles.
Mac
- Select Evernote > Preferences… > General from the menu bar at the top of the screen
- Next to “By default, place new notes into the following notebook:”, choose the notebook you’d like to set as your default
Windows
- From the left panel, click Notebooks to expand and display the notebook list
- Right-click on the notebook you’d like to set as your default
- Select Properties… from the pop-up menu
- Select the check box labeled “Make this my default notebook”
iOS
- Open the ‘Account’ tab
- Tap Settings > Notebooks
- Under ‘Default Notebook,’ choose the notebook you’d like to set as your default
Android
- Tap Settings > Notebooks > Default Personal Notebook from the navigation menu
- Choose the notebook you’d like to set as your default
Web
- Click to open the notebook you’d like to set as your default
- Click the info button (letter ‘i’) in the notebook header
- Select the check box labeled “Set as default notebook”
Web Clipper
- Click the Evernote icon to open the Web Clipper panel
- Click Options at the bottom of the panel
- In the ‘Notebook Selection’ section, check the radio button for ‘Always start in’ and choose the notebook you’d like to set as your default
1 Comment
Comments are closed.